How to Draw a Pumpkin: A Fun Step-by-Step Guide [2025]

Ever stared at a pumpkin and thought, “Man, I wish I could draw that!” 🎃 Trust me, you’re not alone. Whether it’s for Halloween, fall decorations, or just doodling for fun, pumpkins are one of the most popular things people want to sketch. And the good news? Learning how to draw a pumpkin step by step is way easier than you think.
I still remember when I first tried to draw one back in school. My “pumpkin” looked more like a lumpy potato with a stick on top. 😅 But after a few attempts and some simple tricks, I cracked the code—and now I’m here to walk you through it too.
So, if you’re asking: “How to draw a pumpkin easy?” or “How to draw a pumpkin for kids?”, you’ve come to the right place. We’ll cover it all—from the simple basics to drawing a pumpkin face, a pumpkin patch, and even quirky fun like a pumpkin spice latte. It is perfect idea to draw a pumpkin as coloring page.
Ready to grab your pencil? Let’s dive in!
🎃 Key Takeaway
- Start with simple shapes (like circles and ovals) to make the pumpkin easy to draw.
- Add details step by step — stem, curves, and lines to give it a realistic look.
- Use color coding (red for new lines, gray for old lines) so kids can clearly follow each step.
- Finish with bright, fun colors to make the pumpkin come alive.
- This method helps kids build patience, focus, and confidence while learning.
- Drawing pumpkins becomes not only educational but also a fun seasonal activity.
Why Learn to Draw a Pumpkin?

Before we get into the how, let’s talk about the why.
- Seasonal fun: Pumpkins scream fall, Halloween, and Thanksgiving. Drawing them instantly brings festive vibes.
- Versatility: You can turn them into jack-o’-lanterns, pie illustrations, or cute cartoon characters.
- Skill builder: Pumpkins are round but segmented, so practicing them helps improve shading, curves, and depth.
- For all ages: Seriously—kids, beginners, and even seasoned artists love sketching pumpkins.
And IMO, pumpkins are like the “gateway” fruit (yes, technically fruit!) for learning art basics.
How to Draw a Pumpkin Easy (Step by Step)

Alright, let’s start simple. If you’ve ever thought “I can’t even draw a circle,” don’t worry—you don’t need perfection here. Pumpkins look better when they’re a little lumpy anyway.
Step 1: Draw the Base Shape
- Start with an oval—wide and slightly flat at the bottom.
- Don’t stress if it’s uneven; that makes it look natural.
Step 2: Add the Stem
- On top, sketch a short rectangle or trapezoid.
- Curve the edges to make it look organic.
Step 3: Create the Ribs
- Pumpkins have vertical grooves. Draw a curved oval inside the pumpkin, right in the middle.
- Add another curved oval on each side.
- Keep going until your pumpkin has those iconic “ribbed” sections.
Step 4: Outline and Erase Guides
- Trace over your main lines.
- Erase the extra sketch marks.
Step 5: Add Details
- Make the stem rougher by adding little lines.
- Add a tiny curve at the bottom to ground your pumpkin.
Step 6: Shade or Color
- If coloring: orange for the pumpkin, green for the stem.
- If shading: darken one side to create depth.
Boom—you’ve just learned how to draw a pumpkin easy!
How To Draw a Pumpkin-Step-by-Step Tutorial (Kid-Friendly 8-Panel Guide)

Sometimes words aren’t enough—you need a visual breakdown that’s super easy to follow. That’s why I’ve put together this 8-step pumpkin tutorial designed especially for beginners and kids. Imagine it laid out in eight square panels, two rows of four, numbered 1–8. Each panel builds on the last, so you’ll see the pumpkin slowly come to life.
Layout & Style
- Eight square panels (2 rows of 4), numbered 1–8 in bold black font above each panel.
- White background for every panel.
- New lines are drawn in bright red, while previous lines turn light gray—this makes each step super clear.
- Thick, simple cartoon lines keep it child-friendly.
- No logos, text, or distractions inside the drawing panels.
- The pumpkin stays the same size and position in every panel for consistency.
Step-by-Step Breakdown
- Big Oval – Start with a large, simple rounded oval for the pumpkin body (new lines in bright red).
- Refine Shape – Flatten the bottom a little and taper the top slightly so it looks more pumpkin-like (red edits).
- Neck – Add a small, curved shape at the top center for the pumpkin’s neck (red).
- Stem – On top of the neck, draw a bent, curly stem (red). Keep it playful and slightly tilted.
- Center Rib – Sketch a tall, pointed oval straight down the middle. This becomes the central groove (red).
- Left Rib – Add one curved vertical line on the left side to form another rib (red).
- Right Rib + Ground – Add a matching curved line on the right side and a small curved line at the bottom for the ground (red).
- Final Color – Convert all outlines to a thin black outline and fully color the pumpkin orange, the stem green, and add a soft gray shadow under the pumpkin.
Color guide (Step 8):
- Stem (green):
#139447— RGB(19, 148, 71) - Pumpkin body (orange):
#E77A21— RGB(231, 122, 33)
How to Draw a Pumpkin for Kids

Now, let’s simplify it even more for younger artists. Kids need clear, chunky lines and fewer steps.
- Draw a big circle.
- Add a short stem on top.
- Draw three curved lines (left, middle, right).
- Add two more if they’re feeling fancy.
- Color it orange with a green stem.
Pro tip for parents/teachers: Print step-by-step guides so kids can trace along. Want to make it fun? Turn it into a “pumpkin coloring page” after the drawing is done.
How to Draw a Pumpkin Face (Jack-o’-Lantern Style)

What’s Halloween without a pumpkin face? If you’ve got your basic pumpkin shape, here’s how to turn it spooky (or silly).
Eyes
- Triangles are classic—pointy and scary.
- Circles or ovals work if you want a cute pumpkin.
Nose
- A small triangle or upside-down heart looks great.
Mouth
- For scary: jagged zig-zag like monster teeth.
- For funny: a big curved smile with a few teeth.
Keyword tip: If you’ve ever searched “how to draw a pumpkin mouth”, this is the easy way—zig-zag lines!
How to Draw a Pumpkin Patch

Want to level up? Draw not just one pumpkin but a whole pumpkin patch.
Quick Steps:
- Start with one big pumpkin in the center.
- Add a few smaller pumpkins around it (some behind, some in front).
- Sketch vines curling along the ground.
- Add a few leaves—simple ovals with pointed edges.
- Shade lightly to show depth.
This is perfect for classroom projects or fall art. And FYI, if you want inspiration, search for “how to draw a pumpkin art hub”—they’ve got fun step-by-step visuals.
How to Draw a Pumpkin Pie

Yep, pumpkin pie counts too. 🍰
Easy Method:
- Draw a triangle (slice shape).
- Curve the back edge (the crust).
- Add a wavy top line for the crust detail.
- Shade or color: orange inside, beige crust.
- Don’t forget the whipped cream on top (spiral or cloud shape).
And there you have it—dessert on paper.
How to Draw a Pumpkin Cute (Kawaii Style)

Want your pumpkin to look adorable instead of realistic? Go kawaii style!
- Make it rounder and chubbier.
- Add big sparkly eyes and blush cheeks.
- Give it a tiny smiling mouth.
- Use pastel orange instead of dark orange.
It instantly turns your pumpkin into a cartoon buddy. Kids love this style, and honestly? Adults do too.
How to Draw a Pumpkin Spice Latte ☕

Okay, we can’t talk about pumpkins without mentioning the famous pumpkin spice latte.
- Draw a tall cup (like a coffee cup with a lid).
- Add a sleeve in the middle with a pumpkin logo.
- Draw whipped cream on top (cloudy swirls).
- Add cinnamon sprinkles (tiny dots).
- Color the cup beige, sleeve brown, pumpkin orange.
Boom—Starbucks vibes without the calories. 😉
How to Learn Faster?

Honestly? Watch a how to draw a pumpkin video. Visuals make it easier to follow.
Tips for Beginners
- Start light: Use a pencil with soft strokes.
- Break it down: Always begin with shapes (ovals, circles, triangles).
- Practice ribs: Those vertical grooves make all the difference.
- Don’t stress mistakes: Pumpkins are naturally imperfect—embrace the lumps!
Fun Ideas After Drawing Your Pumpkin

Once you’ve mastered the basics, here’s what you can do:
- Turn it into a coloring page for kids.
- Use it in a Halloween card.
- Practice digital art by drawing it on a tablet.
- Try shading it with different pencils for a realistic look.
- Experiment with cartoon, realistic, or abstract styles.
Frequently Asked Questions(FAQs)

How to Draw a Pumpkin Shadow?
To add a shadow:
- Imagine where your light source is (left, right, above).
- On the opposite side, lightly shade the ground in an oval shape.
- Darken closer to the pumpkin, fade out as you go.
How Do You Draw a Pumpkin with a Gourd?
- Start with your pumpkin first.
- Next to it, sketch a gourd (longer, thinner, sometimes bumpy).
- Add a curvy stem.
- Color it green or yellow for contrast.
Conclusion

So, there you have it—your ultimate guide on how to draw a pumpkin. We covered everything from a simple step-by-step sketch to creative spins like drawing a pumpkin face, a pumpkin pie, and even a pumpkin spice latte.
Remember:
- Start with basic shapes.
- Add details gradually.
- Don’t be afraid to get creative (or goofy).
Next time someone asks you, “How do you draw a pumpkin?” you’ll be ready to grab your pencil and show off your skills. And who knows? Maybe your pumpkin doodle will inspire your next fall masterpiece.
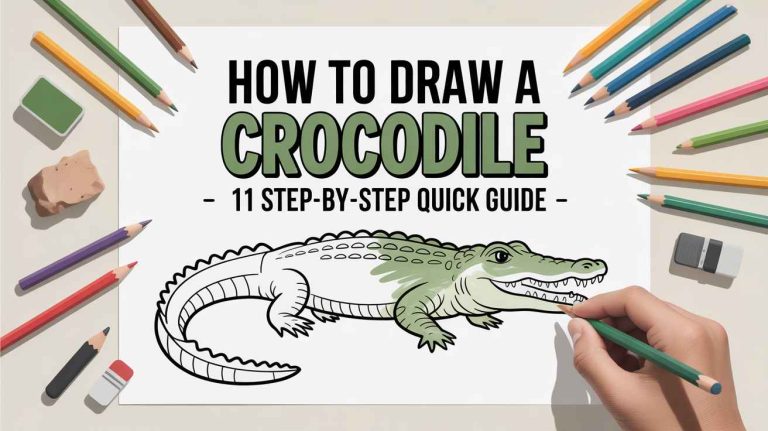
Now it’s your turn—grab that paper, sketch your first pumpkin, and let your imagination run wild. 🎃 If you want to learn how to draw crocodile, you can also visit this article.